Masih dilanjutan series belajar nodejs. Kali ini kita akan mebahas bagaimana cara upload gambar / file dengan menggunakan nodejs.
Tutorial kali ini kita tidak akan menggunakan framework atau tambahan module lainnya. Pure Node js.
Daftar Isi
Hanya menggunakan module http dan fs.
Penasaran seperti apa hasilnya nanti?
Ikuti terus tutorial ini ya.
Daftar Isi:
Persiapkan Webserver
Pertama buat sebuah folder dengan nama node-upload-file.
Buat file index.js yang akan menjadi webserver kita dan isi dengan kode dibawah ini:
const http = require('http');
const fs = require('fs')

let port = 3000

http.createServer((req, response) => {
  /**
   * `/` loads index.html
   */
  if (req.url == '/' && req.method.toLowerCase() == 'get') {
    response.setHeader('Content-Type', 'text/html')
    const stream = fs.createReadStream(`${__dirname}/zindex.html`)
    // No need to call res.end() because pipe calls it automatically
    stream.pipe(response)
  }
  /**
   * `/fileUpload` only works with POST
   * Saves up files to the root
   */
  else if (req.url == '/fileUpload' && req.method.toLowerCase() == 'post') {

    response.setHeader('Content-Type', 'application/json')

    let contentLength = parseInt(req.headers['content-length'])
    if (isNaN(contentLength) || contentLength <= 0 ) {
      response.statusCode = 411;
      response.end(JSON.stringify({status: "error", description: "No File"}))
      return
    }

    // Try to use the original filename
    let filename = req.headers['filename']
    if (filename == null) {
      filename = "file." + req.headers['content-type'].split('/')[1]
    }

    const filestream = fs.createWriteStream(`${__dirname}/${filename}`)

    filestream.on("error", (error) => {
      console.error(error)
      response.statusCode = 400;
      response.write(JSON.stringify({status: "error", description: error}))
      response.end()
    })

    // Write data as it comes
    req.pipe(filestream)

    req.on('end', () => {
      filestream.close(() => {
        response.end(JSON.stringify({status: "success"}))
      })
    })
  }
  /**
   * Error on any other path
   */
  else {
    response.setHeader('Content-Type', 'text/html')
    response.end("<html><body><h1>Page Doesn't exist<h1></body></html>")
  }
}).listen(port, () => {
  console.log(`Server running at http://localhost:${port}/`);
})
Penjelasan Kita hanya akan memiliki 2 request yaitu GET dan POST.
GET akan berfungsi untuk menampilkan form html untuk upload file.
POST akan berfungsi untuk mengupload file ke dalam server dan ditaruh di folder.
Buat view untuk upload file
Buat sebuah file dengan nama index.html. Dan isi dengan kode dibawah ini.
<html>
  <head>
  <script>
  const handleImageUpload = event => {
    const file = event.target.files[0]
    if (file == null) return
    fetch('/fileUpload', {
      headers: {
        'filename': file.name
      },
      method: 'POST',
      body: file
    })
    .then(response => response.json())
    .then(data => {
      console.log(data)
    })
    .catch(error => {
      console.error(error)
    })
  }
  function init() {
    document.getElementById('fileUpload').addEventListener('change', event => {
      handleImageUpload(event)
    })
  }
  </script>
  </head>
  <body onload="init()">
  <input type="file" id="fileUpload" />
  </body>
  </html>
Jika sudah, maka jalankan perintah node index.js.
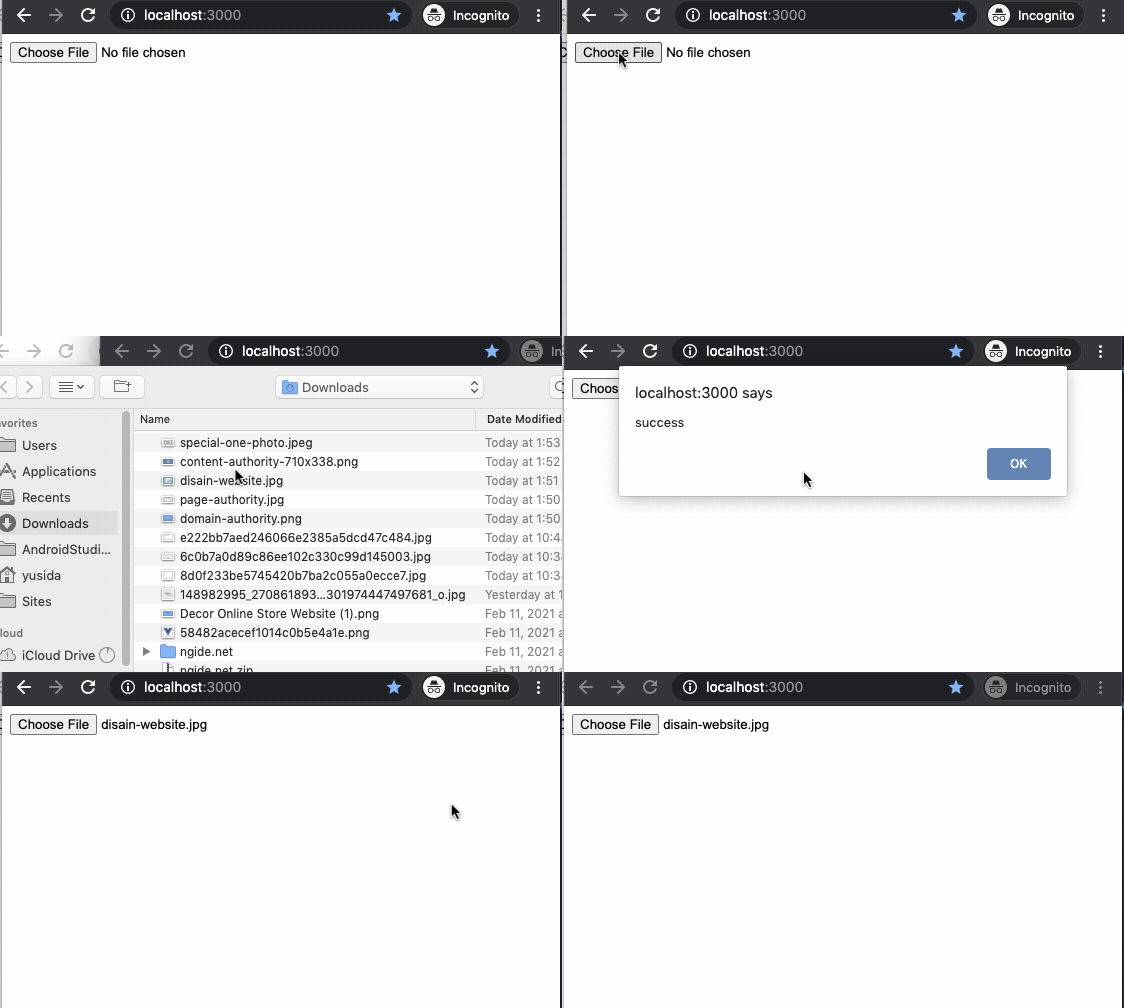
Lalu buka localhost:3000 dan kamu akan mendapatkan tampilan seperti ini.

Coba select sebuah file, dan otomatis akan terupload di root folder directory project kamu.
Mudah bukan?
Ikuti terus tutorial belajar nodejs ini ya guys.
Series Belajar NodeJS Sebelumnya:
Series Belajar NodeJS Lainnya: